Create a roster
Once you've signed up your organization, you can use our start-up assistant to guide you through the first few steps. In just 10 minutes, you'll be set up and ready to go!
Set up your roster in just four simple steps.
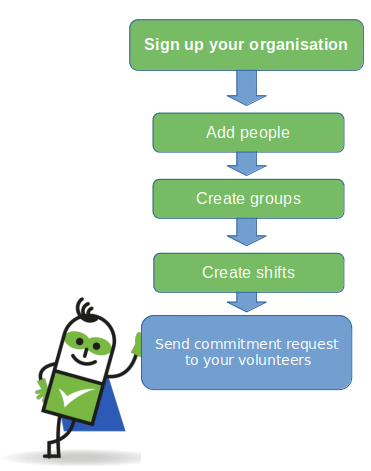
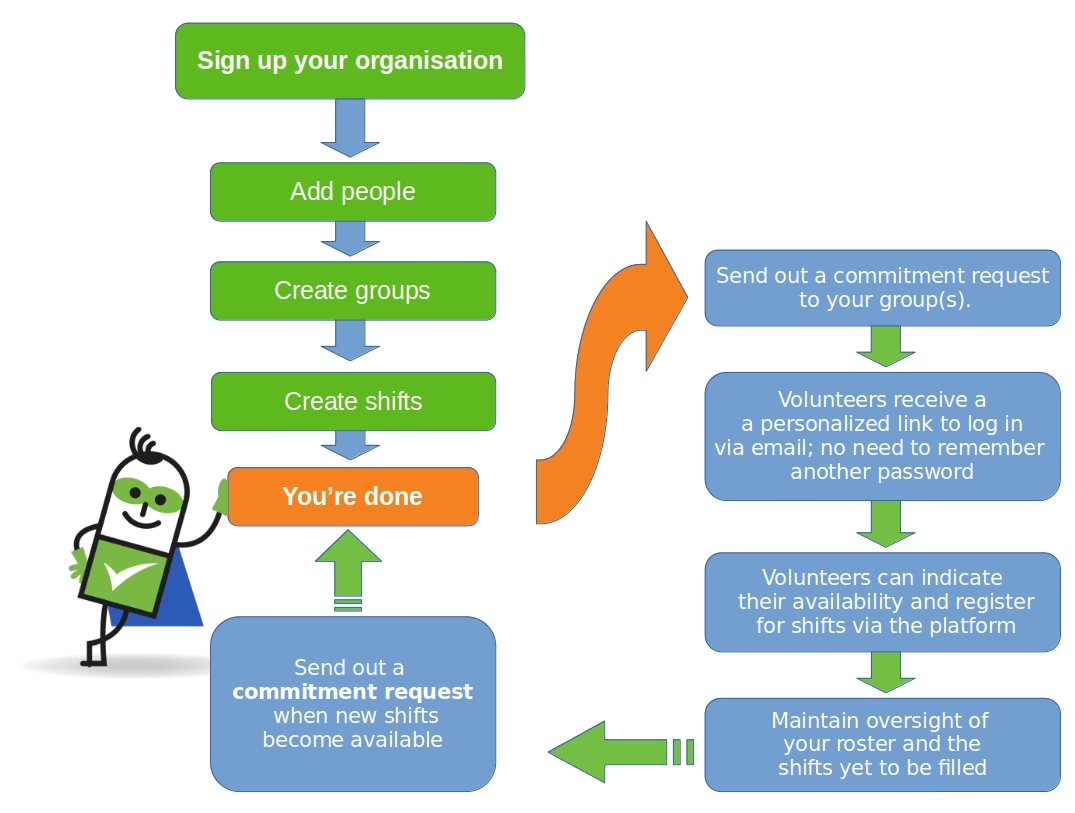

Create groups
Divide shifts into groups depending on the type of work involved. Please note that you will need to create at least one group (e.g., bar work, referees, reception or surveillance) to set up your roster.
Define shifts
You can add shifts individually or as a
recurring event for those that span over a longer period of time.
Add people
You can sign people up to your roster by going to the Management page and clicking Add person under the ‘People’ section. You can add multiple people at once, via an Excel or CSV import.
Send a commitment request
Once you have added all volunteers and shifts into ShiftPlanner, you can send out a commitment request to inform your volunteers of the shifts available. They will then be able to log in and register themselves for the shifts that suit them.
When volunteers are added into ShiftPlanner, they will receive an email with an access token that is valid for 7 days. This can be used to log in without having to enter a username and password.
Settings
By default, the settings are usually right. But you can still adjust it to better suit your organisation. Check the settings on the tabs: General, configuration and role and rights for more information.